Road Rally for My Racine Peeps

This is a little game for the folks in Racine to alleviate their stay-at-home angst and boost their mental health status.  Please click on the Road Rally link below, PRINT this pdf and remember to NOT READ any pages beyond the first until you are parked at the starting spot and ready to begin.

PLEASE NOTE CHANGES:
#30 — It seems the violets might be at the end of their season.  They should be along either side of the street — one side is woodsy, the other side is someone’s yard.  If you can’t find violets, take a “woodsy” picture instead.

#56 — The closed road is no longer closed, (Probably neither is Jimmy John’s?)  but the clue still works.

#69 — The shutters at 2034 may ALSO have been changed for the season.  Just take a picture of the house to get the points for that one.

#77 — The flag tends to get twisted.  If you cannot see the letters, write down the colors of the flag.  1 bonus point if you get (or correctly GUESS) the letters.

COVID duration Road Rally

Advertisement

Song in My Heart

What songs have you memorized?  For as long as I can remember, I have been collecting songs in my heart.   My sister Lynn gets credit for planting this seed in me.  She was 11 years my elder and used to sing me to sleep when I was just a little girl.  Her inspirations included folk artists such as Joan Baez, Peter Paul and Mary, and Joni Mitchell.  When she came home for visits, she would teach my sister Hope and me new songs she had learned — both the melodies and the harmonies.  The sweet loving feelings of being sung to like this set an absolute goal in my mind.  I would memorize songs and I would sing my children to sleep.  Now, I sing songs to my grandson.  It calms him from fretful wakefulness into deep, sound slumber.  So, the seed Lynn planted, in addition to blessing my husband, has benefitted my sons’ and grandson’s lives as well.  Singing can start a legacy.

Over the years, I’ve realized what a rich blessing it is to have so many songs stored in my heart.  I have a 2-3 hour repertoire of memorized songs.  Anybody that goes on a road trip with me gets forewarned.  I will sing through the night as I drive.  Singing is actually a terrific way to stay awake when you are getting sleepy on the road.  I think singing memorized songs is more beneficial in this aspect than singing along with the radio.  There’s something about the pumping oxygen through your lungs and making your brain work to remember all the lyrics that energizes you.    Also, when you are driving an “older model vehicle” in which both the radio and the air conditioner no longer work and you can’t hear your phone/i-pod because leaving the windows down puts you in a wind tunnel, singing gives you a good alternative to pass the miles away — just sayin’.           Singing has its practical applications.

A good many of the songs in my heart are hymns and songs of praise.  This, I learned, adds an entirely new dimension to the benefits.  I have walked through a decades-long battle against depression, have had years of deep frustration, experienced times of great turmoil, and am given to holding bitterness in my heart.  Singing songs of worship to my God and King literally lifts me out of the quagmire.  Worshipful singing changes a broken or distressed heart.

There are times when I am so downcast I cannot lift my heart to sing.  It was a time such as this that God revealed the power of worship songs to me.  He nudged me to just sing (more of a somewhat melodious mumble) the first few words of a song I knew and loved.  With those first few words out, my voice strengthened.  Determinedly, I sang the next line … and the next.  Within minutes, I was singing with my heart and not just my tongue.  I think that was my first revelation of how powerfully this act could take control over despondency, anger and bitterness.  Even when facing odious household chores, I’ve found singing from my heart keeps me in the right frame of mind and prevents me from developing bitterness or self-pity.  Singing sets your heart in the right place.

Another time I remember, I was visiting my aged mother, tending to some tasks she needed doing while she sorted through things at her chair.  I had a song in my heart and I just started singing as I worked.  I glanced up to check on my mom after a bit and saw the sweetest smile on her face.  It wasn’t until I heard my own children making music that I understood how much that blesses a mother’s heart.  Singing can be a blessing to others.

This summer, we experienced a delightful time with old friends who apparently have learned similar lessons and carry their own store of songs in their hearts.  It was our third and final night at the campfire and somehow, over the weekend, I had become the campfire entertainment director.  The first night I had challenged the kids with naming our 50 states, and later the adults with naming capitals.  The second night we had a try at telling continuous stories.  On the third night, when 10-year-old Maddie asked, “Mrs. Franklin, what are we going to do tonight?”, I was running out of ideas, so I suggested we sing songs.  Sarah, a young woman with a lovely voice and the confidence to lead, began to sing songs that we’d all sung together over the years in church.  She had built up her repertoire because she had learned that singing old hymns was the best way to calm her agitated grandmother who is living with them and suffers from Alzheimer’s.  (It should be noted that Grandma much prefers the peppier hymns. ) For over two hours, we sang and harmonized from an oft-shared treasure trove of memorized worship songs.  When half-asleep, young Caleb was taken into bed, he turned back and muttered sleepily, “But keep singing, OK?”  Later, after we’d finished singing a heart-warming rendition of COME THY FOUNT, Maddie called out from the camper next to us, “Sing that one again!”  It is a sweet, memory.  I hope to recreate it with campfires in our yard.  Singing builds community.

In the last few hours before my dear sister Lynn passed away, we had gathered around her bed and sung her both songs of worship (celebrating our shared faith) as well as the songs she had taught my sister Hope and I.  It was such a beautiful experience that the family gathered around my dad’s bed on his last night here on earth and did the same.  Sadly, my mom’s death came suddenly when she was home alone.  We didn’t get to sing her off.  Thankfully though, my sister Hope had called me over to Mom’s one night because she was acting very strange and agitated, and Hope was afraid she was dying.  There were several times like this in my mom’s last year, so it wasn’t an automatic, “Get the family over here,” kind of thing.  Hope and I tucked Mom into bed, prayed with her and listened to her “If I die tonight…” instructions.  After that we looked at each other and mouthed, “Should we sing?”  We decided, last night or not, it would soothe our mother if we sang to her.  We started with the “Lynn songs” and moved into songs of worship and hope.  I am so grateful we had that time of lulling my mom to sleep weeks before the Lord brought her home.  Singing is a great way to say goodbye.

What songs are stored in your heart?

I’m Back

When I started this blog, I didn’t follow the rules for a successful blog. I didn’t narrow down my topic and I clearly don’t post regularly. I don’t inundate people with promoting my posts. I will probably never get rich off of this blog, but that wasn’t my intention when I started it. I started this to bless others and as a platform to share what I know and what I feel.  Sometimes, I need to take time to bless myself.

This past year, a combination of the “tyranny of the urgent” plus physical and mental fatigue have kept me from posting, even when my heart was nudged to share something.  I have cut back on some of my duties and have taken steps to strengthen my body. Slowly but surely I am being revived.  It’s taken a good deal of patience on my part. I’m hoping to now be able to share a little more often and would love to hear feedback from those who read what I write.

FIRST Day of Preschool

sunny-tablewith-wordsA new semester has brought a new group of students.  Today they all took their first step into preschool class.  Most were pretty timid upon walking through the door.  A few tears were shed during the first hour, but they were easily assuaged with a little comforting.  My philosophy with my students is to entice them out of their shell rather than push.  In preparation for first day jitters, I had each parent send me a family picture ahead of time.  When the children came into the classroom, they took off their coats and hung them up.  Then they were told to go to the photo table and find their family.  Hah!  Here’s a task they could not fail.  They KNEW the answer to this test!  You could see visible relief on their faces as they marched themselves and “their family” over to our table to choose a seat.  I try to have Mylar balloons for each student this first day of class.  Who doesn’t love a Mylar balloon?  They make the atmosphere feel fun and festive right off the bat.


WELCOME ACTIVITY
The students found a seat they liked, propped their family photo against their balloon’s weight and proceeded to engage in doing wooden puzzles.  Very few preschoolers can resist the draw of bright wooden puzzles, but I had one today.  He was particularly nervous and could not be drawn out by the lure of puzzles.  Luckily, he was excited to see my shape-sorter ball on the table as well.  This was a “puzzle” he could enjoy.

SCHOOL SKILLS HOUR
Once all the kids had arrived and had sufficient time to explore the puzzles, we welcomed the class and went around the table with each student holding up their picture and telling us about who was in their family.  We noticed that some of our students were the oldest in their family while others were the youngest.  Some had both older and younger siblings.  Two families had all boys and one family had all girls.   I asked students to raise their hands if they had 2 kids in their family, 5 kids, etc.  It was a great time to compare how our families were similar and different.

getting-aquainted36

After everybody got a chance to share about their family, we brought out my Snail’s Pace Race game.  This is probably THE BEST preschool game around.  I like to think of it as a preschool version of the Kentucky Derby, but without the betting.  Theoretically, it is a non-competitive game, but kids can always find a way to compete.  Playing games is a wonderful way to teach a child so many skills, not the least of which is, “How to be a good winner/loser.”  We went over that lesson, and then I took note of the behavior of the children.  Do they have their colors down? (Yes!) Can they play by the rules?  Do they take turns nicely?  Does anybody try to cheat?  The kids took turns rolling the color dice and moving the snails and we all cheered for each snail as it crossed the finish line.

100_3561

Mylar Balloons with Tiny Solo Cup Baskets

100_3562

Stones kept our balloons anchored until we were ready to do our experimenting with them.


The night before, I’d weighted the Mylar balloons by tying them to tiny Solo cup “shot glasses” which I’d melted holes into by using an ice pick which I’d heated up by holding it over the flame of the stove.  Just as I’d hoped, the shot glasses were not enough weight to hold the balloons down, so I added a stone to each cup to keep the balloons weighted. Back to our school time —  I had the children remove the stones from their cups and we spent several minutes delighting in letting the balloons go and trying to catch them before they got away.  Then I laid an assortment of small items out on the table — toothpicks, Q-Tips, little Lego people, hairbands, tiny pom pom balls, fish and teddy bear counters.  I challenged the students to experiment with what it took to keep their cup down.  We found about 4 toothpicks was enough for one boy.  Another discovered that if he put two pom poms in, the balloon sort of floated mid-air.  Some kids had fun just seeing how full they could stuff their cups with all the trinkets.

100_3568

One little bear made this balloon kind of jump around. It took two to anchor it securely.

100_3564

With no added weight, the balloon would float to the ceiling. With just the right amount of added weight you could get it to hover.


getting-aquainted5-2

We folded baby wipes then painted designs on the top layer, and reinforced the design by adding extra paint where needed on the bottom layer.

getting-aquainted9

Unfolding brought squeals of delight.


ART PROJECT
For our art project, we made “tie-dyed” squares.  I got the idea here.  We found it much easier for 4-year-old hands to just fold the baby wipe into quarters rather than twisting and wrapping rubber bands around them.  We painted them with these wonderful liquid watercolors.  While this meant we had to turn our folded wipe over and reapply some of the colors to the backside, I think the results were just as satisfying.

SNACK TIME
Snack time was  another learning experience.  Besides apple slices, we gave the children graham crackers and a little pot of peanut butter and instructed them how to use their plastic knife to spread the peanut butter.  Next they were offered mini chocolate chips, chopped pecans and coconut flakes to sprinkle on top.  Some had never tried coconut before but found they liked it.  This led to a conversation about how even though new experiences (like trying coconut or coming to the first day of preschool) might seem a little scary,  if we are always afraid to try new things, we will miss out on so much in life.

GROUP GAME
Our group game involved sitting around in a circle on the floor and taking turns rolling a ball across the circle to each other.  As we rolled the ball, we had to shout out our name.  Simple as this was, the kids anxiously waited for their turns and seemed to really enjoy the activity.

FREE PLAY
Now, the last hour of our day, it was time for free-play.  Today’s stations included playing with our tunnel, wooden blocks, rubber animals, stacking cups, this Fisher-Price gumball machine (which, even at 4 years old, these kids can’t seem to get enough of),  throwing sock balls to try to hit a Mylar balloon tied to a chair, and a story time corner.  We also brought the wooden puzzles back out for those who didn’t get enough of them earlier in the day.  All play stations got lots of activity.  Free play is a vital part of the preschool experience.  After spending over two hours in the classroom following directions and mostly staying seated, these kids need time to roam and explore.  It’s a wonderful social experience where kids learn to take turns, share toys, cooperate, create and, in some cases, stand in line.

Blocks, animals and cups? The possibilities are endless.

Blocks, animals and cups? The possibilities are endless.

When the parents showed up to pick up their “experienced” preschoolers, they were met with happy faces and chattering children anxious to share about their day.  In order to enhance this communication between parents and children, I send home a take-home letter listing all that we did that day and post pictures to our private group page.

Parenting and Home Schooling Goals: The Good, The Bad and The Ugly

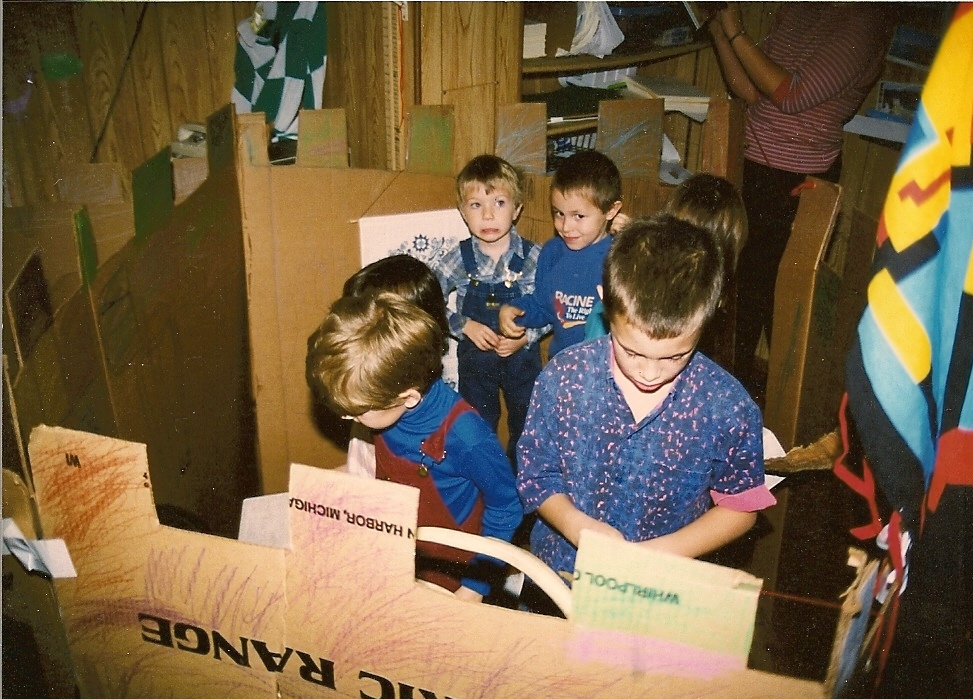
Today I’m going to write a challenge to parents, particularly to home school parents, but it is applicable to all parents.  When we first started home schooling, nearly 3 decades ago, we were advised to write a mission statement, to remind us why we chose this route and to help us focus on our goals.  I’m not sure I ever did that, and probably it would have changed quite a bit over the years.  In its simplest form, it would have been to teach my sons to love learning.  To that end, I’ve definitely succeeded. 

home-schooling-goals

Some of the other goals I may have set – goals which conference speakers directly or indirectly encouraged us to seek – we didn’t reach.  There was a lot of perfection pressure in the home school community in decades past.  It’s still there to some degree, though the direction may have changed a little.  Ultimately, I found making these things my goals often hampered what I’ve come to hold as my most important goal and also put unfair expectations on my boys.  All this pressure to present the perfect picture can wrongly imply to your child that he isn’t good enough – will never be good enough.

I discovered some years back that I was starting to develop a “salvation through home schooling” mentality.  If I did everything right, my boys would embrace my values, love the Lord and live to please Him.  If I parented as well as I was supposed to, I could save my children from choosing sin.   Oh, I probably would never have admitted or even recognized that’s what I was doing, but when it came down to it, that’s what it was.  One of my mantras now is, “You can’t home school (parent) the sinful nature out of your children.”  That’s not your job, and it’s not possible.  If it were, we wouldn’t need the saving grace of God.  We wouldn’t need Jesus’ sacrificial death and resurrection to give us true salvation.

Anyway, I didn’t do everything right; I did a lot of things wrong.  For one thing, my boys grew up with a mom who struggled with, at times, debilitating depression.  Striving for perfection can often lead to depression, by the way.  It took some hard knocks to wake me up to what I was doing.  My husband once told me I had to quit trying to make our kids fit other people’s standards for them.  This too I vehemently denied and I deceived myself.  First I tore him down for not setting (“suitable”) standards for our children.  Then I beat myself up for not being able to model, much less convince my children to adopt, those standards.  I’m here to tell you, you can and should model Christ to your children; this should be our real focus and our constant prayer.  You can lead your children toward Christ, but how, when and even if they truly accept His grace is between them and Jesus.   They will make mistakes and they will force you to face your own mistakes.

I have watched decades of kids graduate from home schooling.  I have talked with dozens of moms distraught over the choices made and actions taken by their adult children.  It is hard to accept the brittleness of goals you put so much effort into achieving.  I have learned we were looking at the wrong goals.

And so I challenge the present generation of hard-working parents:

If you are doing this (home schooling / raising children) to raise saints for the Kingdom, that is a good and godly goal, but they may grow up to rebel.

If you are doing this for “social security” — that is, so your kids will be your friends, that is a lovely goal for your adult children (younger children need you at a different level), but they may walk away from you.

If you are doing this to raise an academic genius, it’s entirely possible they may end up being “average” students.

If you are doing this to proudly build a tower of success (shame on you) it will likely come tumbling down.

If you are doing this to knit your family tightly together, you may succeed, or it may all unravel.

If you are doing this to keep your children from the world, it may result in them clinging to the ways of the world with all their might.

If you are doing this to earn a badge of honor for yourself, you deserve a badge of shame.

If you are doing this to prove you can, you are always at risk of proving you can’t.

What do you do when you have poured all your energies into a goal which ultimately you have no control over?

There is, I have found, only one purpose for home schooling or everyday parenting of your children which is pretty much guaranteed to get the desired results.  That is, you are doing this as an exercise in love and obedience.  Every opportunity you take to love and obey is pretty much guaranteed to expand your ability to love and obey.  In the process, you will have very likely strengthened your family.  Honestly, who can ever have too much exercise in loving those given to us by God?  And who can ever claim they aren’t in need of practice in obeying the Lord? 


hearts8

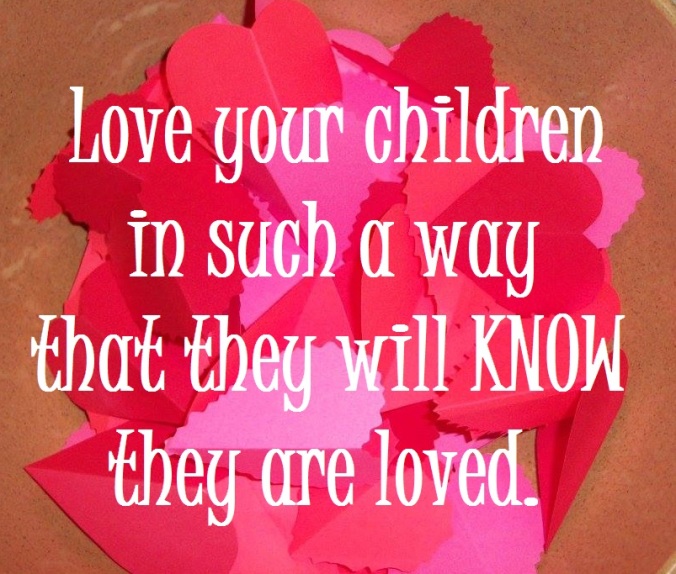
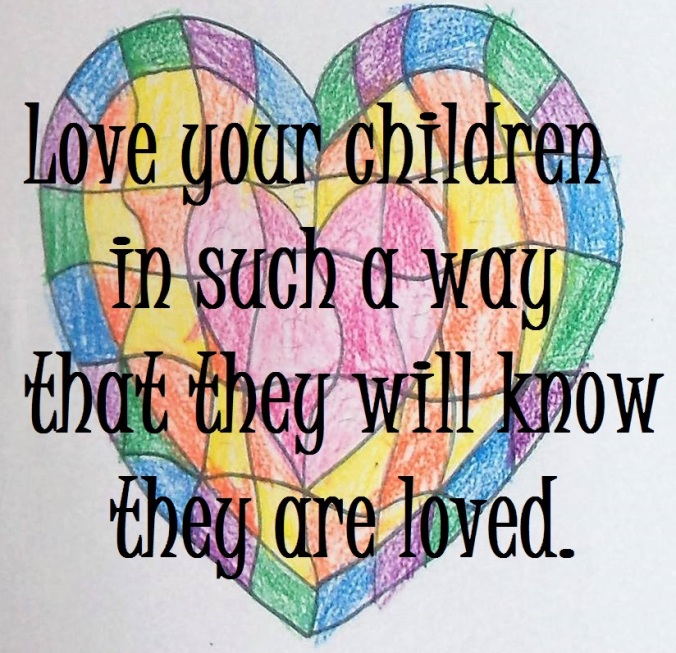
To that end, I have found one response to parenting and home schooling challenges which always seems to work.  Love your children in such a way that they will know they are loved.  Whether they embarrass you, question you, defy you, hurt you – and they will — respond with love.  Read 1 Corinthians, chapter 13 if you need a reminder of what love looks like.  That chapter does not just apply to marriage, in fact, I believe it speaks more to how God loves us.  It is a model of how we ought to love one another.

If you have to cut off friendships that are hurting your relationship with your children, cut them off.  If you have to sacrifice some of your ideals, sacrifice them.  If loving your child means readjusting the goals you set for them, then do it.  When your child needs correcting, let it be given with love, not anger.

When it comes to the “schooling” part of home schooling, love is what drives you to seek the right approach to help your child understand.  Love is what enables you to ask for help when you need it.  Love is what gives you the strength and ability to make the sacrifices required.  Love is what brings you to your knees in prayer to understand, build, strengthen and enable that child.

Read great books to your children.  Teach them the math, science and grammar skills they’ll need.  Teach them history, handwriting and health.  Teach them to love God, their family, their country.  Teach them the life skills they will need and teach them to give of themselves.  But also, be sure to teach their hearts to dance.   Teach them to laugh and sing and hug.  Listen to their heart.  Recognize their strengths and come alongside them in their weaknesses.  They are not your trophies; they are your gift and your responsibility.

When all is said and done, it is near impossible for your child to succeed in life and happiness if they don’t believe they are loved. 

hearts7

Five Senses Day at Preschool

This week at preschool we learned about our five senses.  It was a touchy, smelly, tasty, visual and auditory extravaganza.  When the kids arrived, they were given cheap white paper plates and were told they were going to make it into a pizza.  As we waited for the other classmates to arrive we began coloring the outer edge of our plates a golden brown.  This would be our crust.  Once all the kids were present and had completed coloring their crusts, we put a dollop of red finger paint “sauce” on the middle of their “crust” and they got the delightfully tactile experience of spreading it around the crust with their hands.  We felt the sauce was a little too red and so we added some yellow to smear in.  (We learned about red and yellow making orange last week.)  It helped just a little.  We should have done some hand print art while we were at it but instead we just wiped all the “sauce” off our hands with our ever-present box of baby wipes, then washed the “cleaned” hands in the sink.  In ignorance, we set our pizzas aside to dry.  Apparently finger paint doesn’t dry too quickly.    We’ll get back to the pizzas later … because they turned out GREAT!

108_1988 (2) 108_1989 (2)

Blinking Eyes
While the pizza sauce “dried”, we started working on our “blinking eye” models.  My assistant did all the folding for us as this would have been too difficult for the little guys.  I gave the children a selection of skin tone colors and told them to choose any skin color they wanted to color the eyelids.  After they colored the skin, we added black eyelashes.  Then we unfolded the paper and I drew light pencil circles in the correct location.  The children were instructed to outline the iris in black and color in the pupil except for the shiny spot.  Next they were allowed to choose any color they wanted for the iris color with the only limitation being they had to find a lighter and darker shade of the same color.  I had them color the inner part of the circle with the lighter shade and the rest of the circle with the darker shade.  This gives the eyes a fairly realistic look which was quite pleasing.  As the final step, they were to add a few black lines radiating out from the pupil to the edge of the iris.  These lines got rather bold, but adorable.  Then we folded the paper back to its original form and showed the kids how to blink their eyes by pinching the corners in back and pushing together and forward to open the eye and pulling out and back to close it.  We also discussed how being able to blink is what keeps your eyes lubricated and safe from dirt getting into them.

Next we tested our sense of hearing by shaking old pill bottles (Thank you Mom.)  which I had covered with construction paper and filled in sets of two with various ingredients such as oatmeal, rice, salt,  a single chocolate kiss, buttons, pennies.  The kids had to shake a bottle and then try to find its partner by listening to the sounds of the other bottles as they shook them.  After that, we did the same thing with “Smelly bottles” — paper covered pill bottles again, but this time covered with tissue so we could smell but not see the ingredients.  These bottles contained such ingredients as dry oatmeal, brown sugar, cinnamon, cocoa, ground coffee and black pepper.  At first I tried just putting essential oils on cotton balls so I wouldn’t need to hide the ingredients, but in testing them myself, I was surprised at how difficult it was to tell the difference between rather distinct smelling oils.  I wasn’t too surprised to learn how quickly this put my olfactory system on overload though, so I decided to go more the food route with the kids.  I was too lazy to cover the bottoms of the bottles and it didn’t take the kids long to figure out how to self-check their guesses.

Our sense of touch was the next to be tested.  We had two activities.  We put 5 pennies on a dish for each child, then buried them in rice and had the kids close their eyes and find the pennies.  Next I brought out cloth sacks and put a familiar object in each child’s sack.  I used our reusable cloth Christmas sacks, but a large sock would work just as well.  They were to use their sense of touch to figure out what was in their bag.  Once they got the hang of it, I moved to more difficult items.   After they’d found quite a variety of objects, I put all the objects into one sack and we passed it around assigning each child a particular object to go fish out of the bag.  This proved to be a bit more difficult than identifying the single object, but it was not too difficult for them to accomplish.

Pizza Time!  

We brought our paper pizzas back out along with all the toppings.  Sadly, the sauce was still quite wet.  No matter, we just drizzed glue all over it and then sprinkled our pizza with “cheese” and then real Italian seasoning to make it smell like pizza.  Next the kids topped their pizzas any way they please.  Their inner pizza chefs sprang to life as they created their masterpieces.  I cut all the ingredients out of paper except for the sausage which was cut from felt and the onion bits which was a white raffia ribbon cut in bits. When the kids finished topping their pizzas, we drizzled them with more clear school glue just for an extra measure to make sure all the ingredients stay attached.  The results were stunning.

Snack Time! — finally a chance to play with the sense of taste!
We tasted salty, spicy, bitter, sour and sweet.  The kids were more adventurous in tasting things than I expected.  Most of them even tried nibbling the parsley.

108_2034 108_2038 - CopyFor salty I used a sprinkle of pumpkin seeds.  The kids were offered a choice of a lemon slice or a dill pickle for sour.  Most tried and enjoyed both.  For bitter, they tried both parsley and my chocolate concoction.  I mixed straight cocoa powder with some coconut oil.  One of the girls tasted it and said, “This is Mom chocolate!”

108_2039We decided a little sprinkle of sugar vastly improved the taste for a kid’s palate.  No, I wasn’t teaching them that adding sugar to food made it taste better; I was demonstrating that a little sweetness can take away bitterness.  Speaking of sweetness, we used applesauce for this taste.  The kids cleaned me out on this one.  For spicy I wanted to use nacho flavored tortilla chips, which I did, but for the dairy-free kids I found some spicy crackers that were both gluten and dairy free.  The kids did not know that spicy play dough was waiting on the table for their playtime or I doubt they would have dawdled through snack time as leisurely as they did.

Active Group Play

After snack we usually try to do something active.  Today I tied in out theme of senses for this activity.  Lacking an old fashioned ticking timer, I downloaded a ticking “bomb” app on my tablet and hid it in various places.  The kids had 30 seconds to find it before it “exploded”.  We had to adjust the volume a few times to make it a little more difficult to find, but even still, it never took them the full 30 seconds to find it.

Play Time!
108_2053There were a few other choices, like some musical toys, a prism and our wave bottle (half colored water, half corn oil), but for the most part they wanted to play with the spice-scented play dough for the rest of the afternoon.  This was the first time I’d tried this recipe, and I love it!  It was a bit of a work out stirring six double batches (By the way, doubling the recipe worked 108_2043just fine.)  but it really only took about 5 minutes per batch. Don’t let the cooking part scare you — really.  It was a wonderful texture after I kneaded it for half a minute. I used a variety of spices to both color and scent the dough.  They smelled wonderful and I was delighted with the natural colors I got.  The center one is beet powder, then clockwise starting with the bright yellow, which is turmeric, followed by sage and thyme, cocoa powder, dill and cinnamon.

We brought out all our play dough tools and used our rhythm sticks as rolling pins.  The kids didn’t do much with the cookie cutters but when I brought out the little pie pans their eyes lit up and a little bakery sprang to life.

That brought us to the end of a very sensory day of preschool.  Thanks for stopping by to check us out.  Go here to read about some of our other preschool adventures.

Snowman Day at Preschool

Once a week, I get the privilege of having a handful of 4-year-olds come over to my house for a little preschool time.  We have so much fun together, I thought I’d share our days with you.  Each week we have a different theme and our schedule follows the same pattern:  an hour of school skills, an hour of art, snack time, active group play, free play (including some form of sensory play) at various play stations.

THIS WEEK’S THEME WAS SNOWMEN!

We started our day practicing tracing and cutting skills.  The kids took turns sharing a couple of snowman shaped patterns which they used to trace the shape on their cardstock.  Next they cut the snowmen out — a little tricky to get in the points, but they handled it well.  Each child drew a face on their snowman and glued on one of the scarves I had created out of scrapbook paper.  I had also created hats out of the same pieces of scrapbook paper and put a number from 1-12 on each one.  It was time to begin our game.

The children took turns picking a hat, turning it over to reveal the number and then placing the hat upon their snowman.  They got really excited when the hat paper matched their scarf paper.  Now the task was to place as many buttons on the snowman as the hat showed.  Once we checked to see if they had the right amount, they would switch hats and add or subtract buttons to match the new number.  They were not really taking turns, but all working on their buttons and switching hats randomly whenever they completed their task.  This game was far more engaging than I anticipated and the kids really enjoyed it.  Here is the post where I got the idea.

Next, we made snowmen out of glue which I got from this link.  I did a sample snowman, but it didn’t have the whole 2-3 days drying time necessary to be completely done by the day of class.  I was rather dismayed as it dried because the glue seemed to be absorbing into the wax paper and I thought I hadn’t used enough glue.  I didn’t realize this was exactly how it was supposed to look, so when the kids made theirs I kept encouraging them to use more glue.  While this didn’t hurt their final products at all, it did mean more drying time — about 3 days total for the thickest ones.  The final product had a milky translucency to it and is semi-stiff/semi-flexible.


Probably the best activity of the day was the melting snowmen which I got from this link.  Preparation involved dropping 2 beads and an orange felt triangle in the bottom of a cup, then stuffing the cup with a mixture of baking soda and water mixed to a stiff claylike consistency with a little silver glitter mixed in for fun.  I used red Solo “shot glasses” and I wouldn’t recommend going any bigger than that.  After I firmly packed the cup about half-full, I threw in a couple of sequin “buttons” and inserted two pieces of toothpicks down the side for arms.  Then I set them on the front porch overnight to freeze.  This worked great since temperatures were below zero last week.

preschool Jan 2016 010

Our frozen snowmen awaiting release.

It took some doing to get the snowmen out of the cup.  They were REALLY frozen solid!  We dipped them in hot water, rolled them in our hands, dipped them again and squeezed and prodded until finally, they worked their way out.  It was so fun to see the unique facial expressions each one was “born” with.  Each child was given one snowman on a plastic tray and a 3 oz. spray bottle filled with vinegar.  We also set out small bowls of vinegar and equipped each child with a plastic pipette.  Then we set them loose instructing them to melt the snowmen with their vinegar.  Because the baking soda concoction was frozen it didn’t react as abruptly as the baking soda and vinegar volcano many of us have done.  Each squirt resulted in a satisfying little fizzle and a tiny bit of melting.  The kids began debating which worked better, the spray bottle or the pipette.  One child figured out (after using all the vinegar in his spray bottle) that he could then suck up the pool of vinegar off his tray and refill his bottle.  Then he discovered pouring the vinegar onto the snowman out of the open bottle was a VERY effective method for melting him.  This project kept all the children completely engaged until the snowmen were totally melted.  In all, it took 20-25 minutes.  Wanting to let the children linger over this learning experiment, I decided to knock a few activities off of our list rather than rush this project.

Next, we read the book Snowmen at Night, by Caralyn Buehner and then let the kids draw their own “snowmen at night” pictures with chalk on dark blue paper.  We used colored chalk, but most of the kids chose to just use white anyway.


Snack time consisted of a marshmallow snowman in a field of popcorn “snow” with a side of snowman noses.


preschool Jan 2016 045

I should have cut the button toothpicks shorter, so they didn’t look like daggers, but I was in a hurry.  I dipped a toothpick in food coloring to make the face and used a slivered almond for the nose.


It was time to get active so we split the kids into two teams and equipped each team with a bucket of snowball.  With a barrier set between the teams, we let the snowballs fly.  This activity rivaled the melting snowmen as a favorite, and I think the kids could have gone on forever.

While the snowmen-faced balls are adorable and soft, the plain ones have an incredible texture that feels just like you are packing a real snowball when you squeeze them.

Our sensory play consisted of snow dough.  Again, this was such a fun texture to work with.  It is a simple concoction of baking soda and conditioner in about a 4/1 ratio.  (I used a bit more conditioner than the original post suggested.)  You’ll know the right proportions by feel.  At first, it sticks together but is rather crumbly but as you mix in more conditioner, you get a silky soft feel to it.  It still looks like real snow though.  This packs nicely and can be formed into a snowman.  It’s still crumbly and your hands will get messy, but both these ingredients rinse off easily and will not clog your drain.

I put out a nice selection of snowman accouterments to try to encourage the kids to build one more snowman, but most of them just wanted to immerse themselves in the texture of the dough.  One little girl found a coal shovel in the train set and decided to use it to shovel snow.

Taking a break from snowmen, we ended the day by building a magnificent Duplo train track through the rooms.


Home School Co-op Ideas

As a follow-up to my home school co-ops post, here is a list of some of the group learning activities we’ve done over the years.  Some are not technically a co-op, but they still present excellent opportunities to learn together with other families.

HISTORY PARADE -Gather together a group of creative families with each family committing to creating an entry for the parade.  Each family’s entry displays what they are studying in history that year.  This could involve costumes, banners, wagon floats, perhaps even a musical piece from that period of history.  Set a date for your parade (I suggest February, to alleviate those mid-year blues.) and arrange to march through the halls of a local senior living complex  or assisted living facility(or several of them). Just parading through the halls will greatly bless the residents, but if you want to go further, have some families take responsibility for handing out notices ahead of time to the residents to guarantee a great audience.

A parade in the nursing home is a fun and unique experience which will delight the residents if you're not too noisy.

A parade in the nursing home is a fun and unique experience which will delight the residents if you’re not too noisy.

Other families can organize refreshments which you share with the residents while you visit with them or give presentations about what you are studying.

PRAIRIE PRIMER – In this wonderful year-long co-op we went through the Prairie Primer and decided what activities we wanted to do together as a group.  Each family read through the corresponding Little House book for the month and did whatever other activities out of the book they wanted to cover as a family. We met twice a month for group activities, with different families hosting each gathering and all 6 families contributing assigned duties for each meeting.  Some of the terrific things we did together included:

  • making cheese
  • non-electric night in which we had a night of entertaining activities by candle light and the punched tin lanterns the kids made at the previous activity.
  • doing a shadow theater which was really awesome
  • a prairie Christmas celebration
  • making silhouette portraits
  • making leather mocassins
  • a night with the grandparents which included square dancing and a “Farmer Boy”  banquet of recipes from the Little House Cookbook
  • a campout weekend at Laura Ingalls Wilder Days in Pepin, Wisconsin

MIDDLE AGES – This one was a two-month commitment.  Families studied the Middle Ages in whatever way they wanted, but our group gatherings included the following activities:

  • designing a family crest and making it into a banner

    scan0094

    Human Chess Players

  • playing human chess and learning what the different chess pieces represented
  • building a 3-room castle complete with drawbridge out of refrigerator boxes
  • visiting a Middle Ages re-enactment
  • taking a field trip to Medieval Times
  • hosting a banquet in which the children were assigned parts to play (minstrel, jester, server, cup-bearer, juggler, etc.); we ate cornish hens, multi-grain bread, venison and other fine fare off of (pita)bread trenchers; we decorated the hall with our family crest banners, and thoroughly entertained all the grandparents as we tried to prove that yes, their grandchildren were getting plenty of social exposure and were, indeed, learning a great deal.
    Family Crest Banner

    Family Crest Banner

    Castle Building

HEALTH and NUTRITION-  One field trip included a trip to the grocery store where we were given a guided tour through the produce department and got to taste some of the more exotic fruits.  After that, we were allowed to roam the aisles on a scavenger hunt where the kids were to read labels to find items with very specific nutritional content.  Another field trip included a tour of a dentist office and some education about good oral health habits.  An activity day focused on the five senses and included crawling around in a model ear, dissecting a cow’s eye and other sensory activities.  There were also fitness tests, keeping food diaries, and a day of learning about balancing fun with work in which the kids learned to do fun things such as face painting and juggling.

YOUNG PUBLIC SPEAKING – In order to ease the (elementary aged) kids into public speaking we met monthly with a group of families to recite memorized poems and to give short speeches within assigned parameters — for instance one month it might be “How to do something,” another month, “describing my favorite place,” or “our family tradition”.

BOOK DISCUSSION GROUPS – In addition to our literature discussion groups, especially at the high school level, we would tackle the tougher subjects by going through the same books together and creating presentations, quiz questions, and other challenges for each other or just generally discussing the matter together with other students and their moms.  In this manner, we covered such topics as American government, psychology, worldviews, logic, and science labs.

"Blood and Guts" group on "Nervous System" day

“Blood and Guts” group on “Nervous System” day

BLOOD and GUTS –  That’s the name of the book we used.  In this co-op group, one of the moms (a registered nurse) taught the lessons — each month focusing on a different body system; one mom set up arrangements with a local butcher to get a pig heart, lungs, digestive system, and whatever other body parts we were studying that month “strictly for educational purposes” — we had to sign a form each month promising proper handling and disposal; another mom organized snacks for co-op days (How could we eat?); and one amazing mom agreed to host our monthly meetings in her home.  Additionally, each mom contributed a variety of experiments and activities to further expand upon that month’s particular body system.

Our plastic tarp version of a tipi

 NATIVE AMERICANS – In this two-month co-op, each family chose a different region of the country and studied the tribes that lived there.  Our group activities included

  • learning Native American games, dances and crafts
  • making costumes
  • constructing a 12-foot tipi
  • studying the various types of houses in each region
  • visiting the Indian Summer Festival
  • culminating in a night where we gathered together to share foods from, model costumes of, and present reports about our chosen region’s tribes.

WORLD TOUR –  Each family takes a turn hosting the group and chooses  a country for their family to study.  On their host day, they provide food, crafts, activities and presentations about that country, teaching what they’ve learned to the other families.  Each child gets a passport and marks off the various countries as they learn about them.

Alternatively, this can be done as a one-time event.  Rent out a gym or other large hall at a church or school and host a World Tour night.  Each family chooses a country to study.  They put together a display about that country and stand at their table ready to talk to visitors about their chosen country.  Optionally, families might provide food from that country to give out in small samples.  They are also instructed to bring stickers, a rubber stamp or some other form of representation of their chosen country with which they can mark passports.  When visitors arrive  they receive a passport with all participating countries listed.  As they “tour the world” they get each county’s sticker placed in their passport at the appropriate spot as they gather information from the kids about the country they studied.

SCIENCE FAIR –  Whether you want to run this as a co-op or class in which the students learn how to do a science fair project, or otherwise leave it up to the families to study that themselves and just organize the event, a science fair is a great way to get kids excited about science and the scientific process.  Be sure to provide judges and awards.

WILD WEST – Work together with other families to recreate the Oregon Trail, the gold rush, the Pony Express.  We went to a nearby Wild West Museum and learned all kinds of things.  The Pony Express and the Oregon Trail were two of our favorite memories.  I will write more about them in another post.

scan0128

Hopefully, I’ve inspired you to give this co-op thing a try if you are a home schooling family.  If you are not a home schooling family, perhaps I’ve given you a window into our world that explains why we are so sold on educating our children in this manner.  This is why I try to explain that you can’t compare home schooling to public or private schooling as easily as some people like to believe.  It’s just a very different approach to educating.  It’s not for everybody, but I’m so grateful we chose this route for our family and feel very blessed to have been able to share the adventure with all of the wonderful families we’ve met along the way.

If you’ve participated in home school co-ops, I’d love for you to tell us what you did and how it went in the comments below.

Home School Co-ops:  How and Why?

 Australian and Asian Animal parade at Milw. Zoo 1990

Australian and Asian Animal Parade

If you are looking for a way to break away from the monotony of textbooks and wish to add a little life to your curriculum, co-ops are the way to go!  I’m not referring to such things as enrichment classes which can serve something like 80 families and 150 students, though in a sense, they are a co-op.  What I’ll be discussing here is small co-ops of a handful of families focused on studying the same topic for a set amount of time.  When planning a co-op there are several things to be considered:  How do you go about choosing families for your co-op?  How controlling should you be?  What type of problems might you run into?  How can you choose and limit activities?  I will give you the basic model we created that has proven very successful for co-ops I have been involved in, and then go on to answer the other questions and concerns.  In another article, I will share some of the different events and activities we did as a group.

Ideally, the co-op should enhance your chosen topic without putting undo time and energy constraints on its participants.  Your co-op doesn’t have to be a year long thing.  You can plan a 1 or 2 month commitment if you want. Truthfully, I can’t co-op continuously.  At most, I can do two years in a row.  Co-ops expend a lot of creative energy and can burn you out if you don’t take occasional breaks from them.

Civil War

Civil War Co-op

We’ve been involved in a number of co-ops over the years. Some have been wonderful.  Some have added extra stress to our home school. Some were just for a social outlet. By the grace of God and the pioneering spirit of the early home school families, we managed to create a beautiful model with the first co-op we attempted.  For the most part, we have used the same basic set up for all the other co-ops we ran.  Here is the model we created:

  1. Keep it limited to about 6-8 families (You will likely need to “close” your group at some point to keep it from ineffectively growing out of control.)
  2. Choose the families carefully; you need to have similar expectations and similar commitment levels.
  3. Choose a topic to study together; let each family study the subject as they see fit at home, but focus on being prepared for upcoming co-op activities.
  4. Lay out a schedule for the semester/year appointing two families to organize the events for any given month. (It works much better to have two moms working together rather than assigning one mom to take on all the planning for any given event.) Every month a different set of moms steps up to the plate so there is not too much burden on any one family.  Alternatively, we had each mom team take two months in a row and then they were done hosting for the year.
  5. We liked to meet twice a month, once for a field trip or speaker pertaining to our topic of study and once for a group event (a themed banquet, learning new skills, an art project, each family giving a presentation, etc.).
  6.  Limit your activities.  Weed out those that are less valuable or too demanding in time, money or energy.  Even still, it is possible to incorporate several different activities into a single group activity day.
  7. While only two families are involved in the organizing for each month (Be SURE to rotate this responsibility!), ALL the families are assigned a contribution of some sort whether it’s bringing supplies, bringing food, preparing their own presentation, etc.
  8. Make a clean “end” to your co-op, thereby freeing yourself to move on and/or create a new co-op with other families (or some of the same). Things get stale if the same 6 families keep trying to carry on co-ops together year after year.
Prairie Family gets a visit from Mr. Lincoln

Pioneer Days

CHOOSING FAMILIES

The chemistry of the families involved can make or break a co-op.  Be a little exclusive here.  If you have a friend or two that you know would love to do this with you, invite them privately and let each of the 3 families invite one other family to the group.  You don’t have to advertise that you are starting a co-op.  Personally, I have a hard time saying no to anyone, but when it comes to co-ops, if you’re not willing to draw some lines, you may as well skip co-oping.  Completely open co-ops are dsestined to fail.

You have to have somewhat like-minded families for this to work.  If one family wants to be really laid back and focus on crafts and another family wants to have each child deliver a 10 page report, you’re going to have problems.  If two moms are working their bottoms off and the other 4 are sitting in the other room just chatting with one another, that’s not going to work well either.  You need families committed to participating and not just taking.  There’s nothing wrong with focusing on crafts OR research papers; just make sure the group is like-minded.

Castle Construction

Building Castles with the Middle Ages Co-op

Another question is what to do about younger siblings.  We have always allowed preschoolers to participate.  And it was an unspoken rule that parents would keep their younger children involved or otherwise involve them quietly in a corner of the room so as not to disrupt the activity or stress the hostess.  It is also important to understand the necessity of respecting the home and belongings of the host family.  Again – Keep your co-ops small and manageable.

There are other reasons for limiting the size of the group.  First of all, if you are meeting in somebody’s home, it’s unreasonable to have 30 kids show up.  Secondly, it’s important that everybody does their fair share.  If every participating family doesn’t have to carry a share of the load, you will end up with uncommitted families that will take advantage of those that are willing to put in the work.  Usually you want at least 2 families working together to “host” any given event, but if you get more than 3 or 4 families hosting, it becomes “too many hands in the pot”. Finally, you will find if you limit the number of families, it will be a more intimate group where real friendships have a chance to blossom and grow and it is unlikely that anyone will be ignored or left out.  Also, it’s less intimidating to plan and activity or make a presentation before 12 peers than it is before 30.  Big enough to share the load, small enough to avoid cliques – that’s my recommendation.

If you don’t know many families, you may have to just publicly put your feelers out there on your local home school forum or facebook group.  If that’s the case, really spell out what you are looking for – something like this:

Oregon Trail Day

Oregon Trail Re-enactment

“Fun family of upper-elementary students looking for 5-7 other families to co-op for two months on the Solar System and two more months on the Oregon Trail.  You can choose to join us for either or both studies.  We will not be following any particular curriculum.  We will have a planning meeting for each co-op to decide exactly what we want to do as a group, but other than that focus, you use whatever materials you like to study the subject.  We will meet twice a month for each co-op alternating between field trips or speakers and hands-on activities and presetnations.  You must have a student in the 3rd – 5th grade level to join.  Older and younger siblings are welcome to participate as well.  We expect all children to be kept under control and to be respectful and cooperative.  Each family will commit to helping organize one of the two events for each study.  Failure to hold up your end of the bargain may result in asking you to leave the co-op so other “cooperative” families can fill your spot.  We will limit the co-op to a maximum of 8 families.  If more families than that are interested and willing to commit, we may break into two groups.  If you are interested, please call …”

You can also put out a more general announcement such as, “Is anybody else studying The Oregon Trail or the solar system?  We might be interested in doing a few group activities together.”  Gather whoever is interested, then split into groups based on ages and/or levels of commitment.  It’s possible only one or two families end up responding and it becomes evident you won’t work well together.  If that’s the case, just graciously decline and say you’ve decided a group might not be best for you at this time.

With a little planning, a good dose of commitment, and the careful choosing of participants, co-op groups can add tremendous depth and fun to your home school experience.

Next time, I will share some of the things we’ve done together in co-ops and other ideas for group activities.

My Blog is Up Again

Old Folks + Technology = Comical

I’m so sorry to anybody who has tried to get to my blog these past few days. I was experiencing technical confusion. Not only was my blog inaccessible, but in trying to problem solve, I inadvertently deleted the first copy of my recent post along with all the nice “likes” I got so quickly. There were issues with my domain name, but I didn’t know about them because I had used my gmail account to register my name. That would be the very same gmail that I’ve periodically tried to get to for at least a year. So desperate was I that I even humbly admitted to my tech savvy sons that their old mom couldn’t find her inbox and needed help. They couldn’t come down to my level of inefficiency far enough to even understand how that problem could even exist. Well, today I conquered. I’ve both fixed the issues with my website AND I found my inbox ! (thereby being able to see the notifications about the problem) Unfortunately, I got so excited, I forgot to note how I got there.

Suffice it to say, my blog is up and running again.  The changes this year will bring SHOULD allow me the time to do more writing.  Please come and explore what I share. Invite friends and leave “likes” and comments. It’s very encouraging to me and it broadens my perspective to hear from you. Thanks for hanging in there with me.

~ Beth